Difference between revisions of "Charge cooler install"
| Line 48: | Line 48: | ||
[[File:ccwiki04.jpg|800px]] | [[File:ccwiki04.jpg|800px]] | ||
| − | 9b. There is potentially an alternate route that would allow you to avoid the styrofoam completely, but would require some very tight bends on the hosing (plus extra length of hosing). Perhaps with some 90deg connectors this could work, but I decided to go for the more direct route and chop through the foam. This alternative is the red route on the following diagram. | + | 9b. There is potentially an alternate route that would allow you to avoid the styrofoam completely. This is side impact protection foam so avoiding damage to it would be nice (older cars didn't have it, and you're barely scratching it... so keep that in mind), but would require some very tight bends on the hosing (plus extra length of hosing). Perhaps with some 90deg connectors this could work, but I decided to go for the more direct route and chop through the foam. This alternative is the red route on the following diagram. |
[[File:ccwiki05.png|800px]] | [[File:ccwiki05.png|800px]] | ||
Revision as of 15:08, 28 January 2020
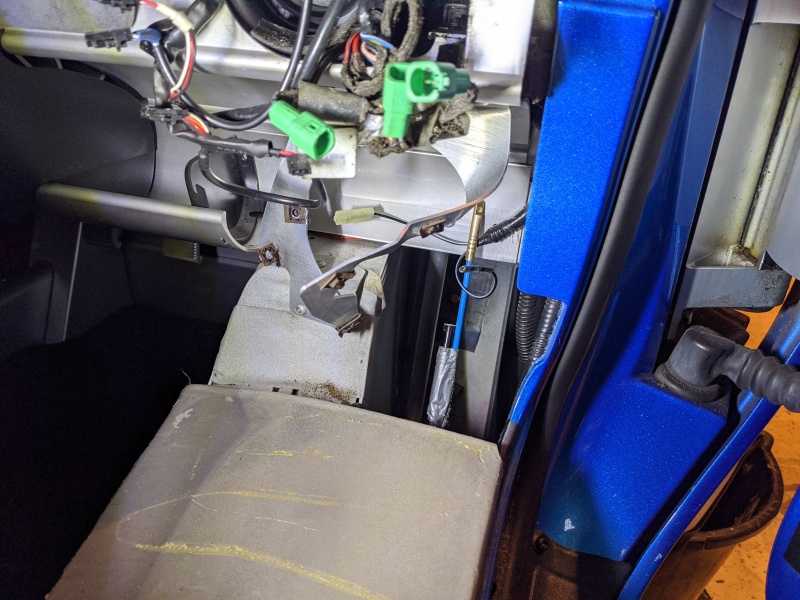
Pro Alloy Charge Cooler Install - Exige S2
This page will outline the installation of a 2019 Pro Alloy Charge Cooler kit for an S2 Exige. The kit has evolved somewhat over the years, but still even with refinements it does not come with a comprehensive installation guide... but it should be DIY'able with basic tools and a few extras.
Tools needed (in addition to a standard socket/spanner kit):
- 34mm holesaw (seems to be a rare size, 35mm will also work)
- 30mm spanner (if you have oil coolers)
- Some fishing wire rods for feeding cables through walls etc. Not mandatory but fairly useful
- USB/Wifi Endoscope for scouting out and navigating in the sill. Not mandatory but very useful.
- Some silicone sealant or similar
- Chisel(s) for hacking through foam.
- Hacksaw or hose cutters
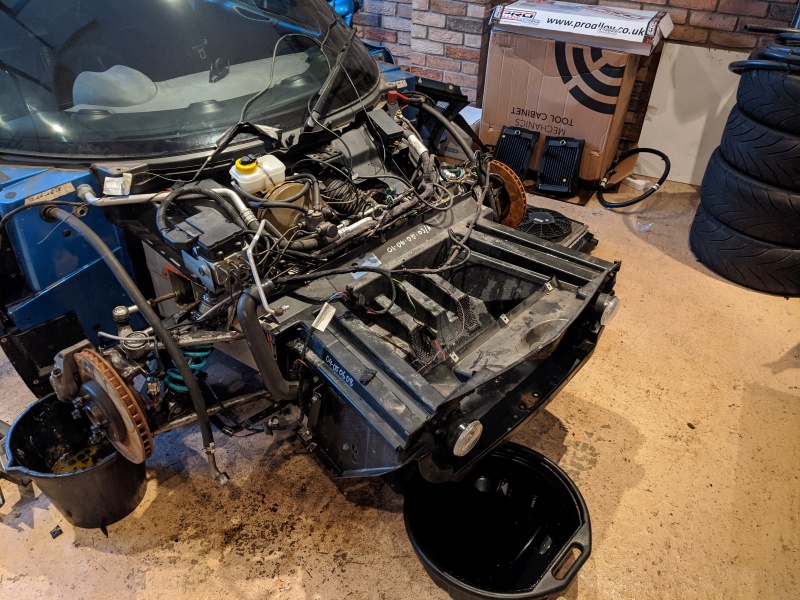
- Soldering Iron/Solder/etc. Could use bullet terminals and crimps if preferred.
- Everybody has a hammer, right?
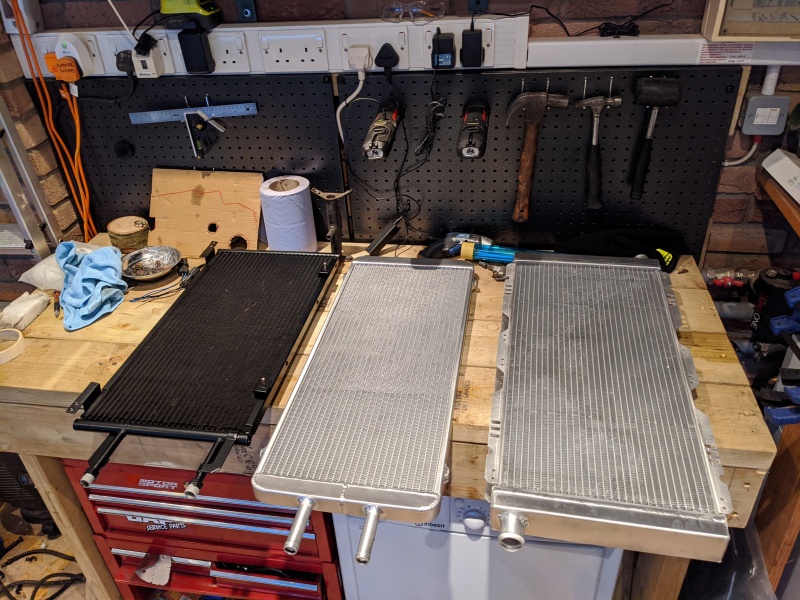
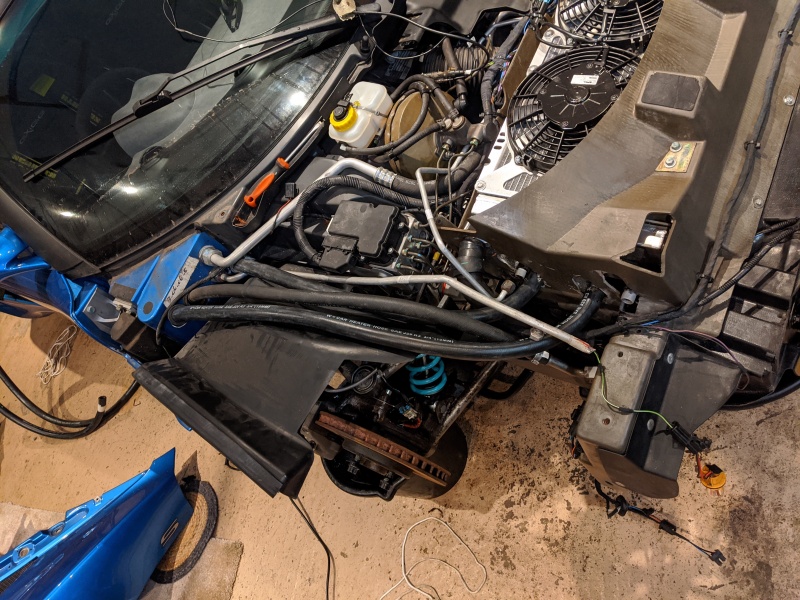
The installation involves adding another radiator to the front radiator shroud, for AC cars it is recommended to get a Pro Alloy main radiator too as the three rads (AC, Charge Cooler and Engine) can coexist together with the supplied brackets. The radiator needs supplying with water from the chargecooler unit that will replace the OEM intercooler, this means running hoses through the OS sill. Depending on whether you have AC and/or front oil coolers you may have a sill that's more or less crowded than others. My car had both oil coolers and AC, so is about as crowded as it gets but still wasn't too bad.
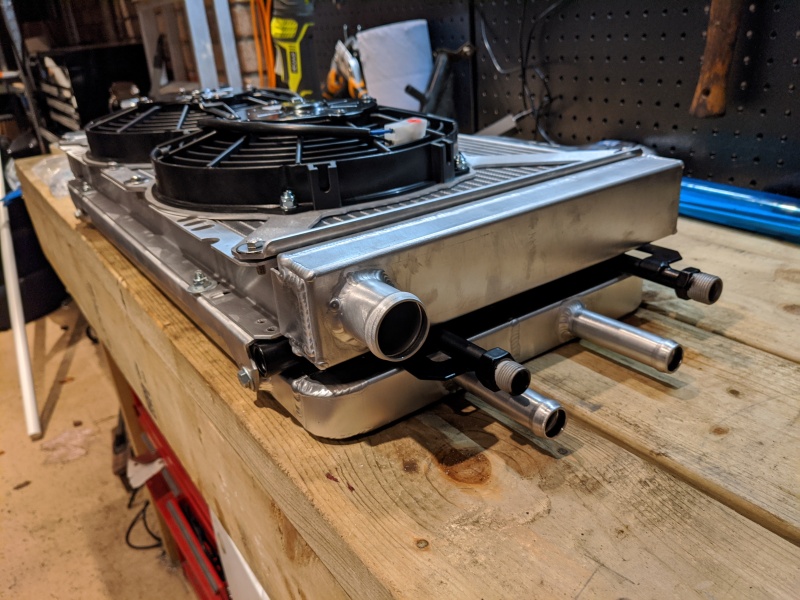
On an AC car, you'll need the system draining before you start and you'll need to remove the condenser to fit the kit. There's a reasonable chance that you'll destroy it in the process as the pipe fittings will probably weld themselves in, so be prepared/budget for a condenser replacement too.
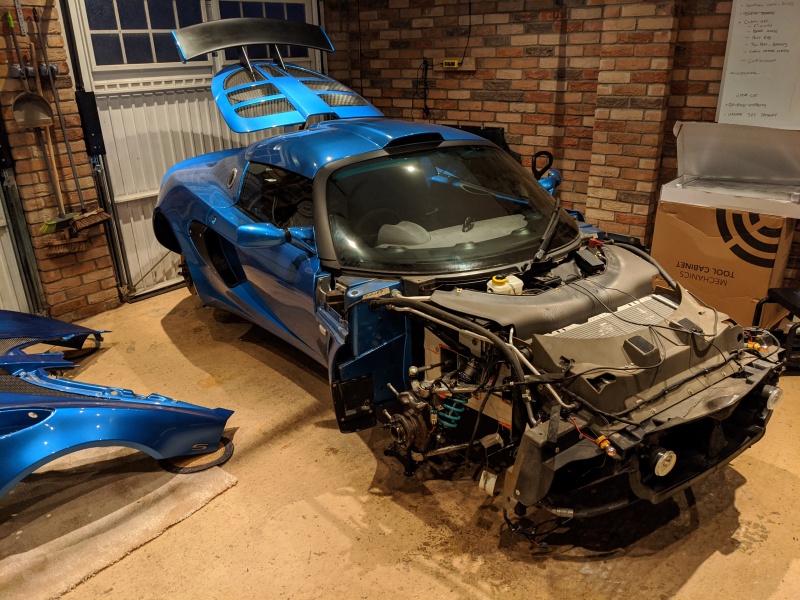
1. Remove the front clam https://wiki.seloc.org/a/Remove_S2_front_clamshell
2. Jack up the OS of the car, and remove both wheels and arch liners
3. Inside the car, remove the OS Sill pad (two torx screws at the front, one crosshead on the rear side. It may be stuck down - just gently peel it up.
4. Remove the speaker cover and the additional torx screws. (later 'black dash' models may differ, but shouldn't be too hard to figure out...)
5. Remove the speaker and gently bend the bracket towards you.
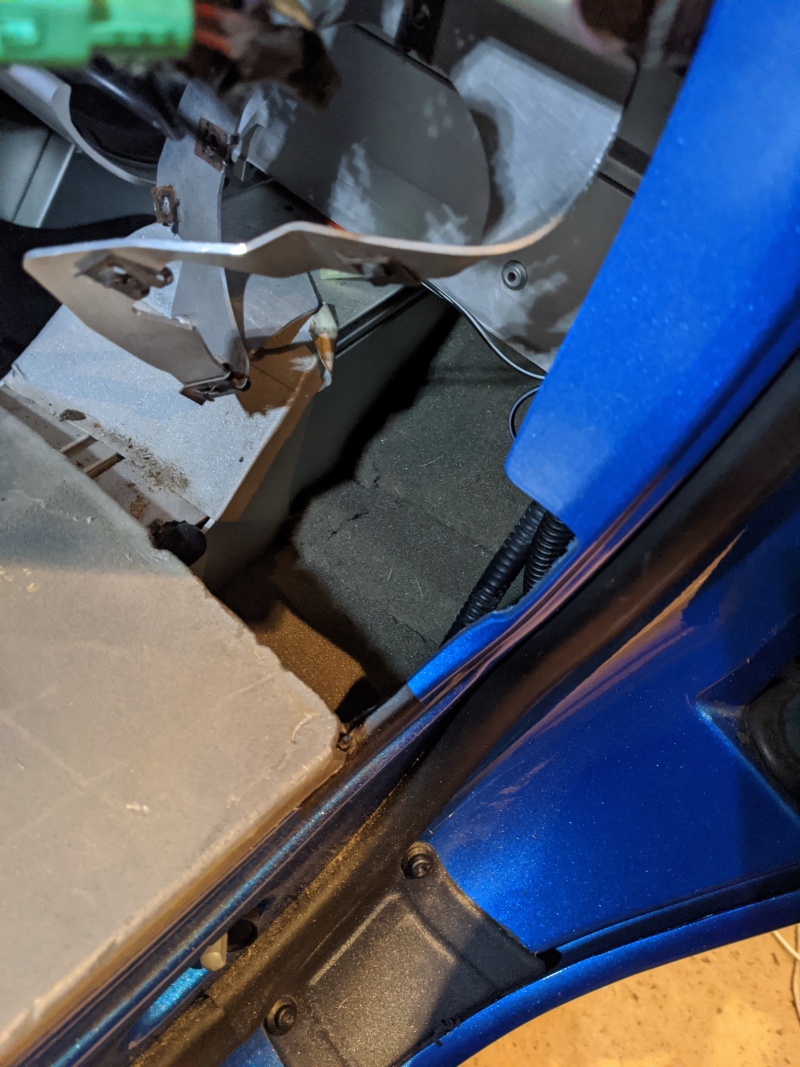
6. Pull the soft foam out (if present) through the speaker gap - this will give you access into the sill. In hindsight I would also unscrew/disconnect the door switch sensor (it's down in the sill and detects when the door is open/closed) as forcing pipes down here later can/will break the back of the switch. Luckily it's a <£10 part and easy to source!
7. By using the endoscope, you can now see up towards the top of the wheel arch and where the pipes will exit. Mentally map out the existing plumbing so you can avoid it later. If you spin the endoscope round towards the rear of the car you'll find the first obstruction for your plumbing - a thin piece of NVH foam.
8. You can either remove this foam completely by stabbing at it with whatever you have long enough - then retrieve it with a bent coat hanger or similar. Or you can try to cut a hole through it. I was able to attach my endoscope to a long screw driver and hacksaw blade, and push through a couple of existing perforated sections (it's almost as if Lotus expected another two hoses to be run through here....) - then join them together with the hacksaw blade to make a bigger single hole. Video here: https://www.youtube.com/watch?v=q_BkK2Cw_-U&feature=youtu.be. Thing is, despite all this effort - trying to poke the two CC pipes through it was a "pipe dream", and in the end I just removed it. Start with this, save yourself some effort :)
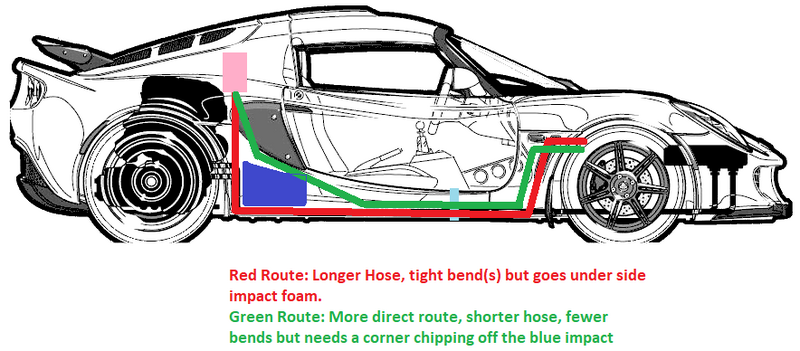
 This diagram shows the rough location of the two obstructions. Light blue is the thin piece of NVH foam, dark blue is the hard styrofoam at the back (step 9)
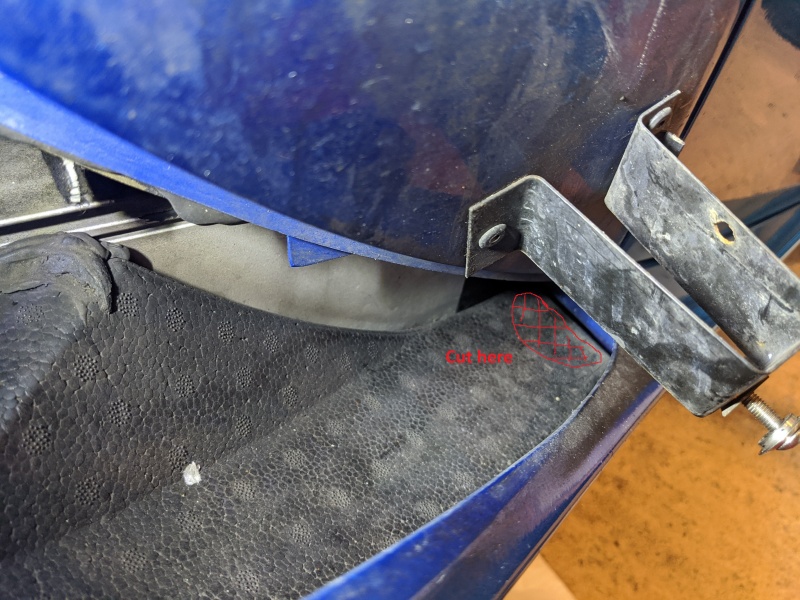
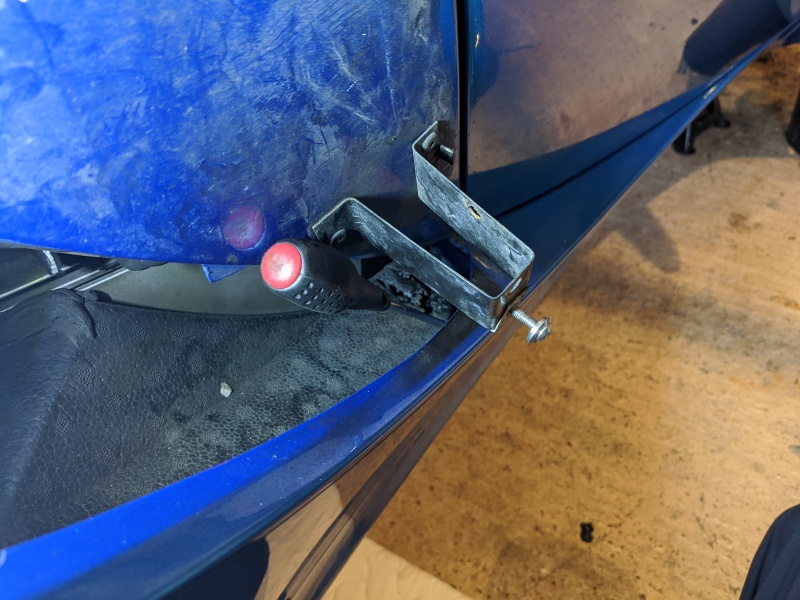
9. From the rear wheel arch you should see a piece of hard styrofoam like material which seals off the bottom of the sidepod (if you have AC, the AC pipes will go down into this foam). You need to tunnel through this a bit to allow your hosing to enter the sill. I did this by removing the driver side sidepod to get good access to the front corner of the foam, then just started chipping away with a hammer and chisel. Don't hammer too far, as you'll chisel through an AC pipe, and don't miss your chisel with the hammer and hit your car door. Your kit should include two short lengths of hose, these are easy to maneuver so I used these to test the size of the foam-hole. Once happy, move onto the next step.
9b. There is potentially an alternate route that would allow you to avoid the styrofoam completely. This is side impact protection foam so avoiding damage to it would be nice (older cars didn't have it, and you're barely scratching it... so keep that in mind), but would require some very tight bends on the hosing (plus extra length of hosing). Perhaps with some 90deg connectors this could work, but I decided to go for the more direct route and chop through the foam. This alternative is the red route on the following diagram.
10. Using the wire/rods, push some strong cord through the hole in the styrofoam towards the front of the car. I attached my endoscope to help navigate through. Once the string is visible in the front of the sill (from inside the car), pull through a few feet of rope. (probably worth running two seperate lengths through in case you get a snappage)
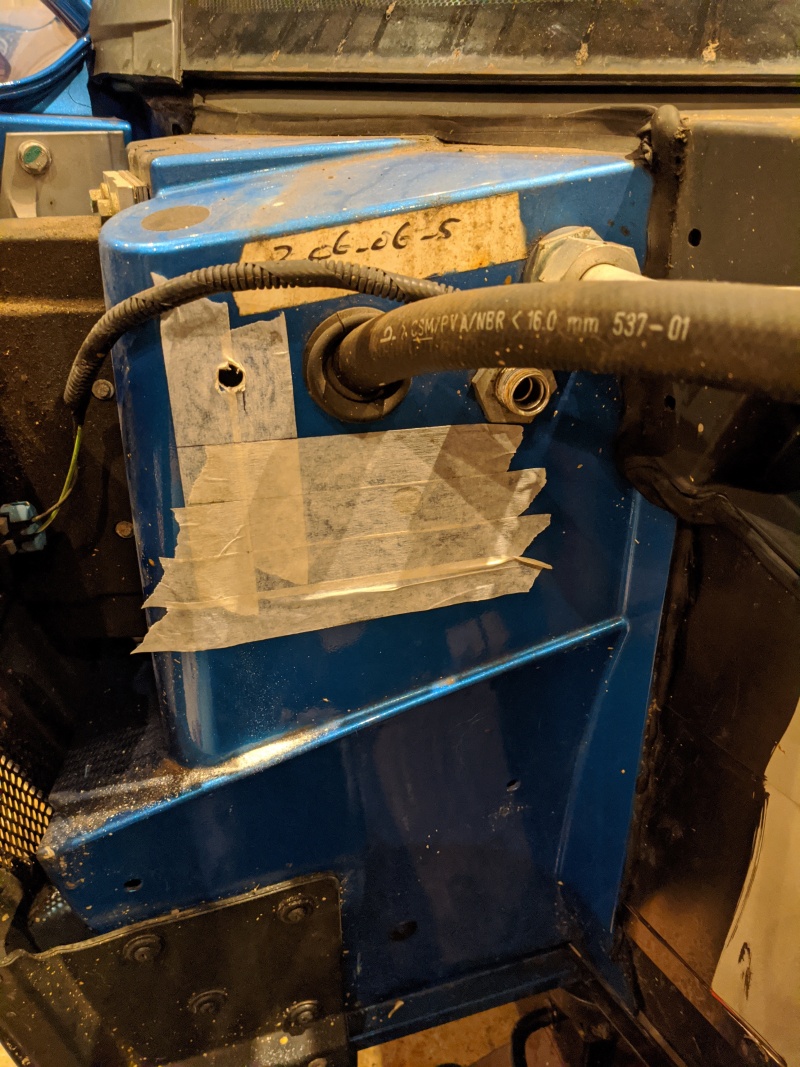
11. In the front wheel arch, mark out your holes for the 34/35mm hole saw. I opted to run one hose towards the outside of the car, and one hose towards the inside as this allowed me to avoid the existing oil cooler lines and AC pipes with most room to maneauver. There are a few options here though, cutting out one large oval hole would probably be easier if not quite as neat. I've tried to map out the hidden plumbing in this diagram, note the AC pipes kink to the outboard direction so the seemingly empty channel in the centre of the panel is not actually empty.
Take note to avoid any plumbing inside the sill and try to have at least 25mm gap between holes to leave some strength in the fibreglass (alternatively you could grind out one big oval and line it with trim. Fit the supplied 34mm grommets.
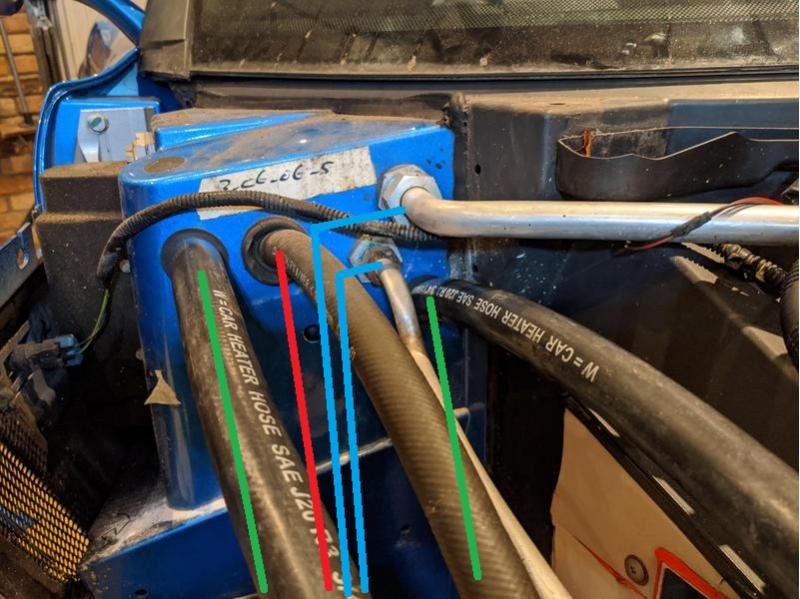 Green = New CC Lines
Blue = AC Lines
Red = Oil Cooler Lines
12. At the rear of the car, prepare your long sections of supplied hosing (mine were slightly different lengths, I marked the shorter of mine with a ring of masking tape at each end in case this was important later). Attach them to the cord/string that's inside the sill and push the end in through the hole(s) in your styrofoam. You may choose to lube up the hose a bit with washing up liquid etc. Alternatively you can feed in from the front and pull back from the rear, your mileage may vary.
13. Gently push the hose through, potentially have one person gently tugging the cord and another gently pushing the hose. I found the rope/string to be largely useless and was used as a guide if nothing else. If I were to do this job again (not a chance!) I'd probably just push from the rear and hope for the best... there's only one way the hose can go at the end of the day. Eventually the hose should pop through into the cavity that's accessible from the cockpit. Using your hand (or the hand of a small child), guide the two hoses up towards the grommetted holes and push through. (Getting it through the grommets might be impossible, if so pop the grommets out and push the hose through the naked holes, again using the string/pull method if needed. Once through, slide the grommet back on and poke it into the hole with a flat bladed screwdriver)
14. Have a beer, the hard bit is done. Sort of. Your hands are almost certainly in a lot of pain too - so maybe have a day off.
15. Remove the two rubber hoses from the rad and drain into a bucket. Disconnect the AC lines
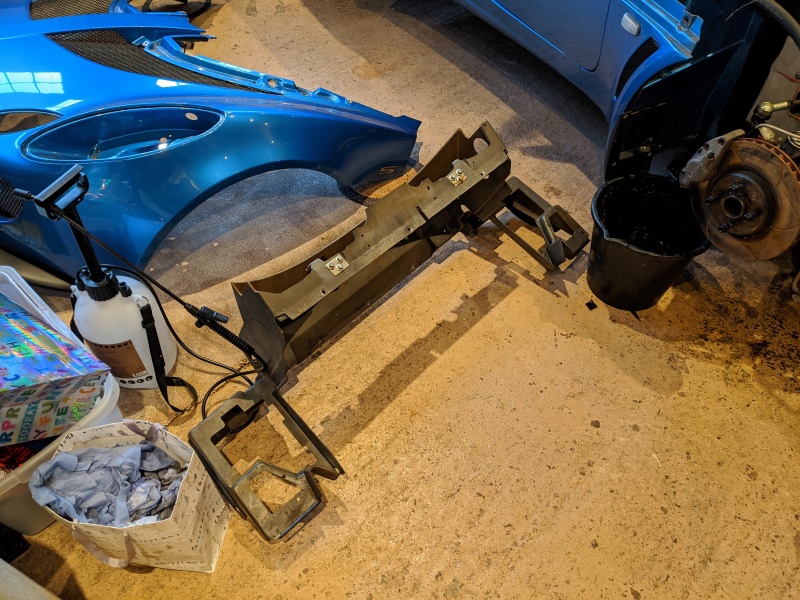
16. Whilst draining, start undoing all of the fixings for the radiator shroud. These are mainly 10mm bolts and if you've got oil coolers, these will need disconnecting too in order to remove the shroud and this is where the 30mm spanner comes in. Once the oil coolers are off, and all fasteners are removed - the shroud (with rad) should feel very loose and will only be tethered by the fan wiring.
17. Disconnect the fan plugs from the loom.
18. Remove the old rad and fans with the shroud, once off the car you can remove the 8(?) 10mm bolts to release the rad/fan combo from the shroud. Be careful because the shroud is very floppy without the radiator bolted in, and the back end of it is quite flimsy - try to support it the best you can whilst removing the rad.
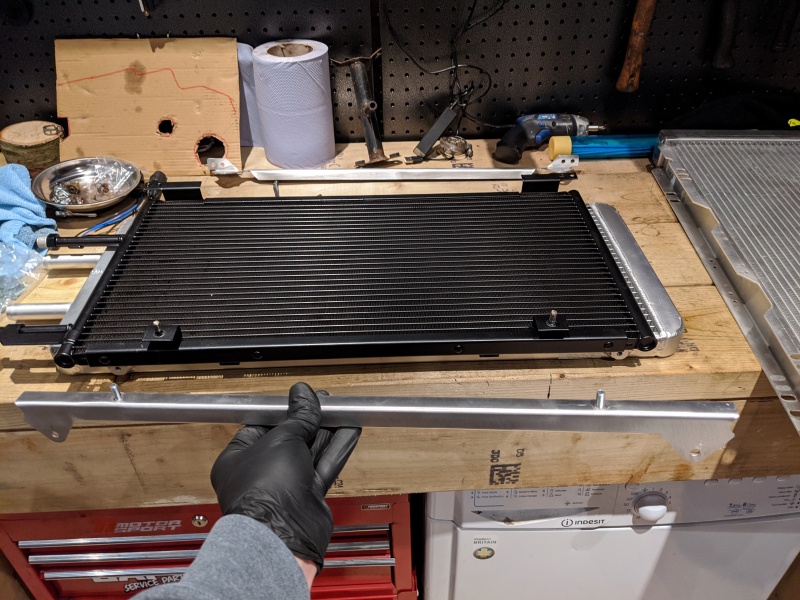
19. You can now start the fun/satisfying stuff and construct the new shiney gear. Assuming it's an AC car the stack of radiators from the bottom to top is: Charge cooler pre-rad -> AC Condenser -> Main Rad -> Fans. The AC Condenser (if you bought a new one) might come with a bracket already rivetted on, and this will need drilling off CAREFULLY in order for the new chargecooler bracket to fit. The AC Condenser can be sikaflexed (or similar) into the grooves of the bracket, then the bracket bolts into the CC rad and main rad. It's fairly self explanatory when it's all in front of you.
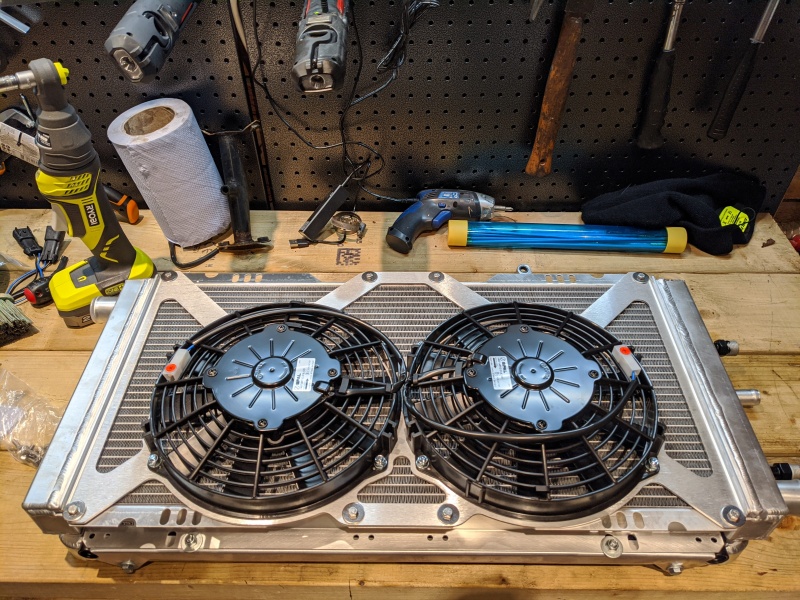
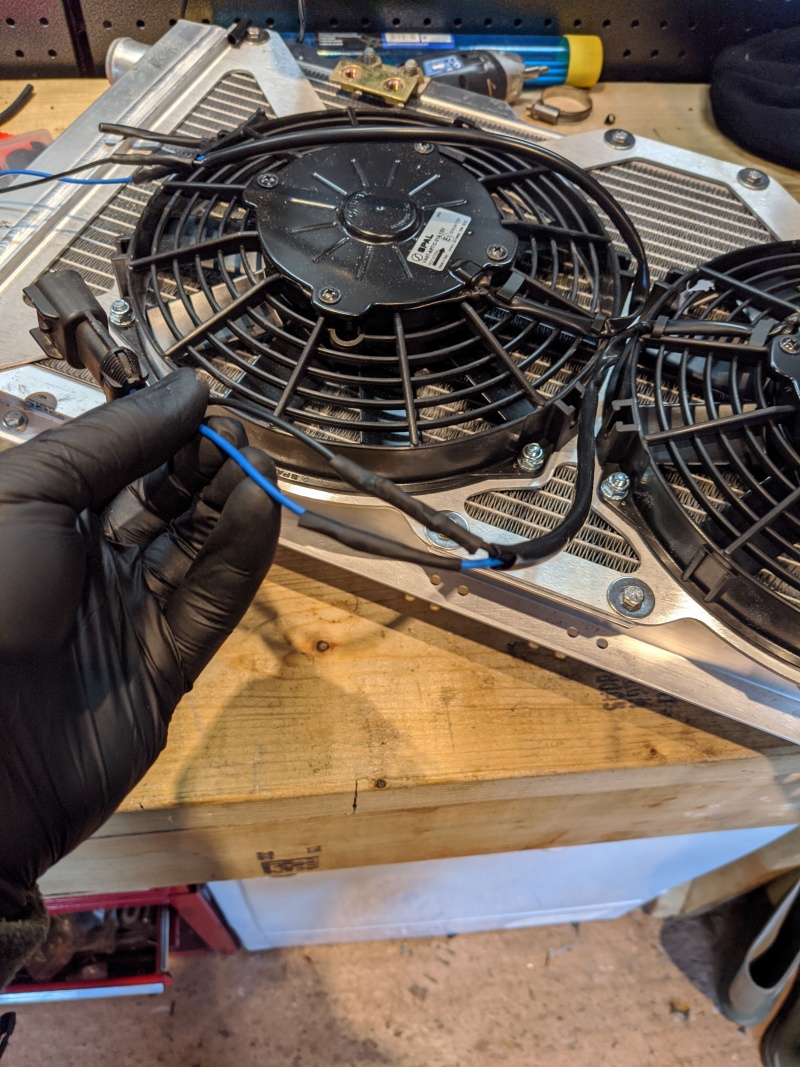
20. With the 'stack' prepared, attach the top mounted fans. Depending on what is supplied you may need to chop the plugs from your OEM fans and solder/bullet connect these to the wiring on the new fans. The Polarity will dictate the direction of airflow and we want these fans to "Pull" the air through the stack. This can be tested later, but I simply wired blue to blue and black to black and it was correct. Some cars/fans can apparently differ.
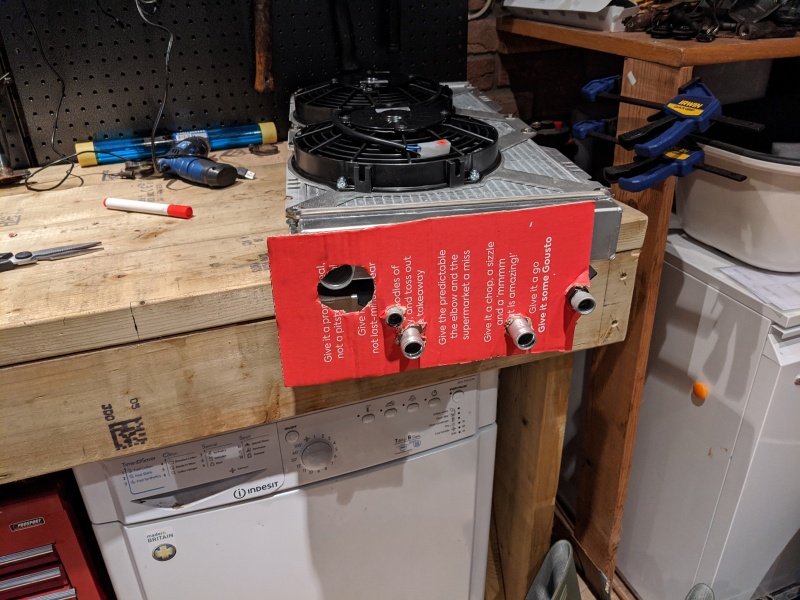
21. The shroud needs modifying to take the CC pre-rad. I made a cardboard template of the existing holes and then pushed that up against the radiator stack to make indentations where the new holes would be needed. Once mapped out, I used a holesaw on the shroud to make the appropriate adjustments. Note that the AC hoses had changed relative position from the coolant hose, so it wasn't just a case of making two more holes - but actually four more. Additionally when it came to trial fitments, just drilling a simple hole wasn't enough due to the angle you need to tilt the radiators in, so I ended up elongating my holes quite a bit with a dremel multi-tool and 'burr' tool.
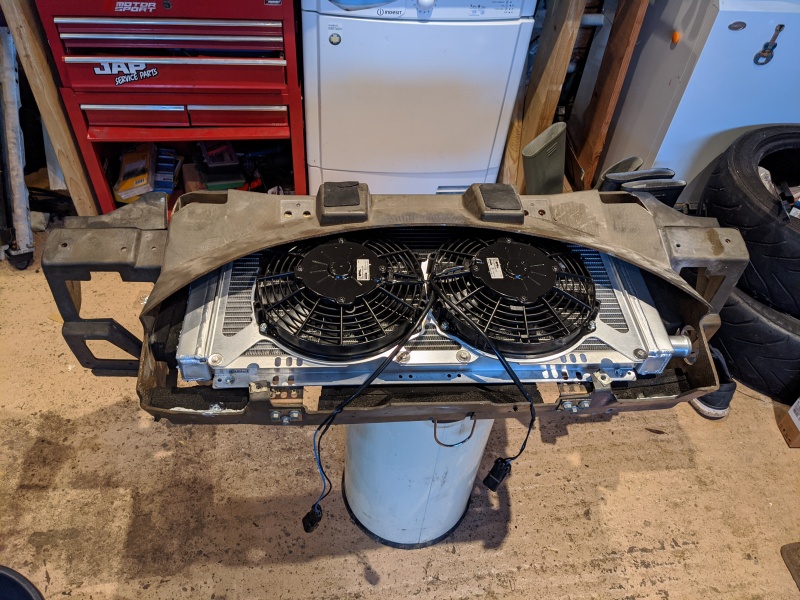
22. Fit the new rad stack to the shroud and use the original fixings
23. Refit the shroud to the car (one of the 10mm bolts for the shroud is obstructed by all of the ABS/brake pipework and is a nightmare to get back in. I left it out, don't tell anybody), and re-attach the coolant and AC lines to the radiators (I bought some replacement o-rings, sizes can be found on the Deroure parts diagram for AC). Attach the fan loom.
24. You can now trim and fit your chargecooler hoses, minding clearance from the wheel arch liner. (Keep offering up the arch liner to gauge how much clearance/space you need.)
25. Refit the oil coolers and tidy up the wiring loom for the lights/indicators etc. Replace any broken clips.
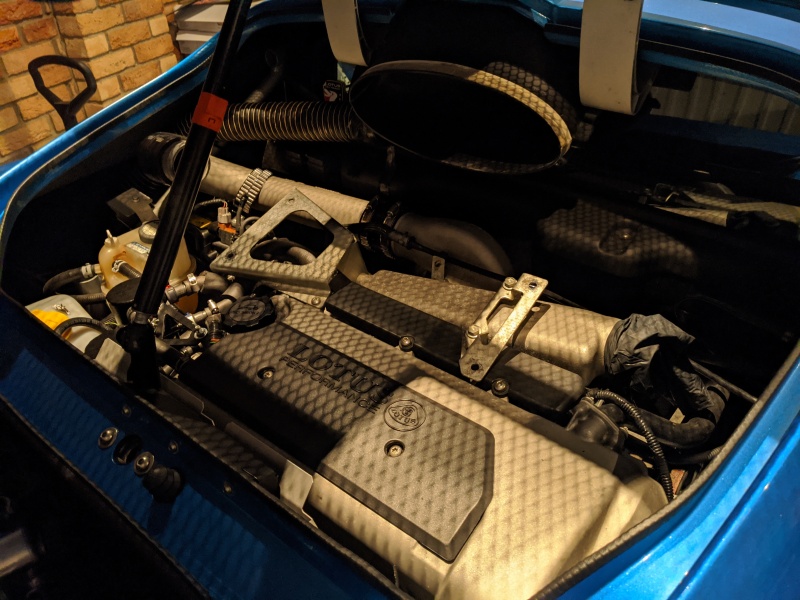
26. At the rear of the car, disconnect the intercooler hoses (6mm socket or flat blade screwdriver on the jubilee's). Remove the four 12mm nuts holding on the intercooler and detach the IAT/Pressure sensor from the IC.
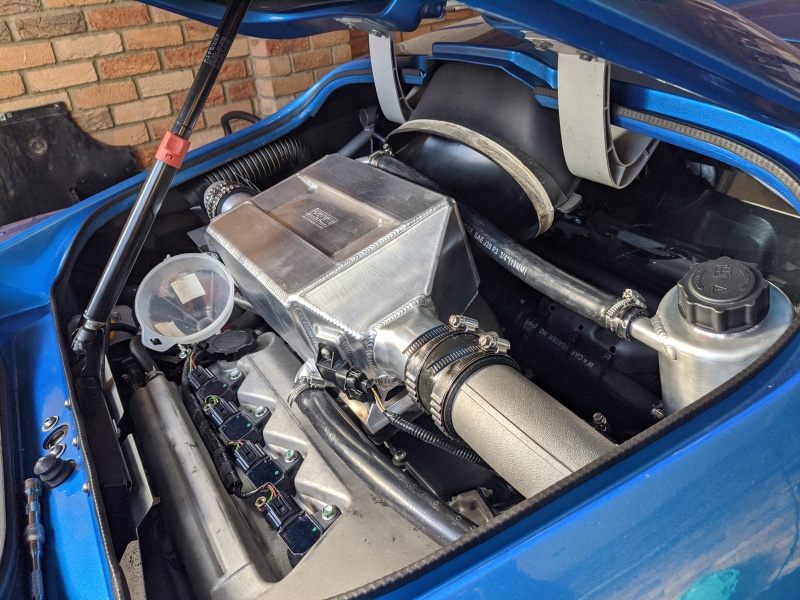
27. Replace the IC with the Pro Alloy CC unit and re-fit the IAT/Pressure sensor. Refit the pipes for boost.
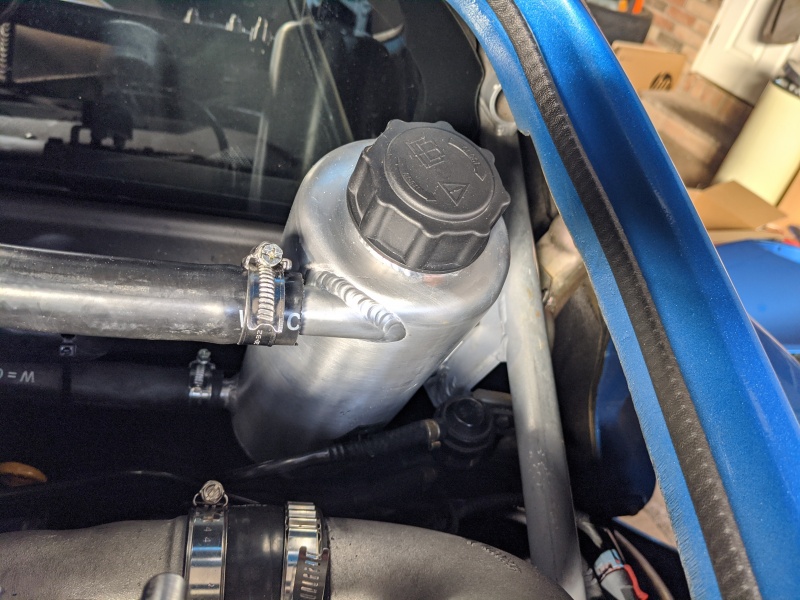
28. Bolt the header tank to the driver side roll-over protection support. My support had a welded on nut which my boost sensor used to be attached to, I removed this and drilled a hole in the centre of the support plate. The caphead bolt threads through the back (access/visibility is better from the wheel arch) and screws into the threaded bracket for the header tank.
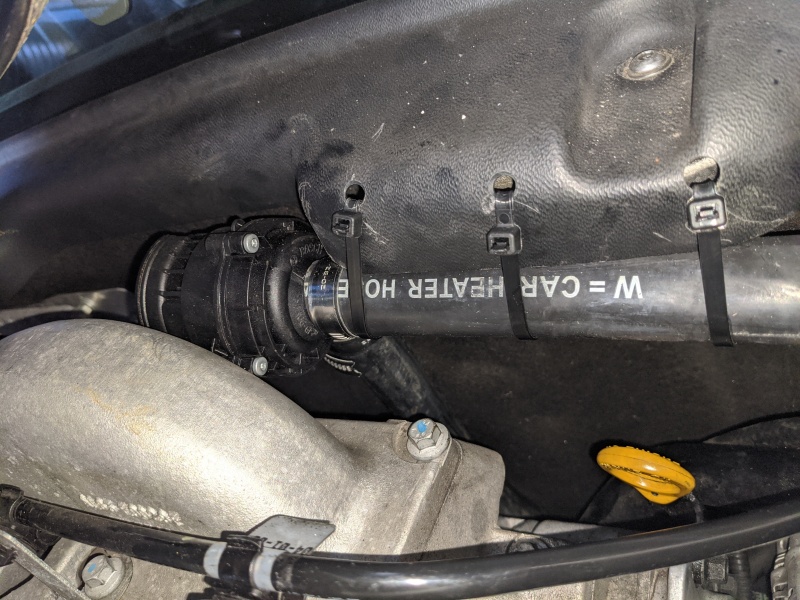
29. Attach the hosing in the following circuit: Charge cooler (rear) -> header tank (top) -> header tank -> Pump -> Chargecooler Pre-Rad -> Charge cooler (front). Boosted air moves through the unit from NS to OS, and your goal is to have the coolant flowing in the opposite direction for maximum efficiency, so coolant should enter on the OS bottom and leave through the NS top.
The pump is small and light enough to be suspended by the hose alone, but I ran a small horizontal piece of hose from the bottom port of the header tank which ran parallel with the plastic shroud on the top of the bulkhead/firewall. This allowed me to cable tie the hose and hence pump into position. The outlet from the pump is aimed towards the floor, and the output hose runs down back behind the alternator (tucked behind some existing coolant hoses) and then loops back round towards the wheelarch under the charcoal canister.
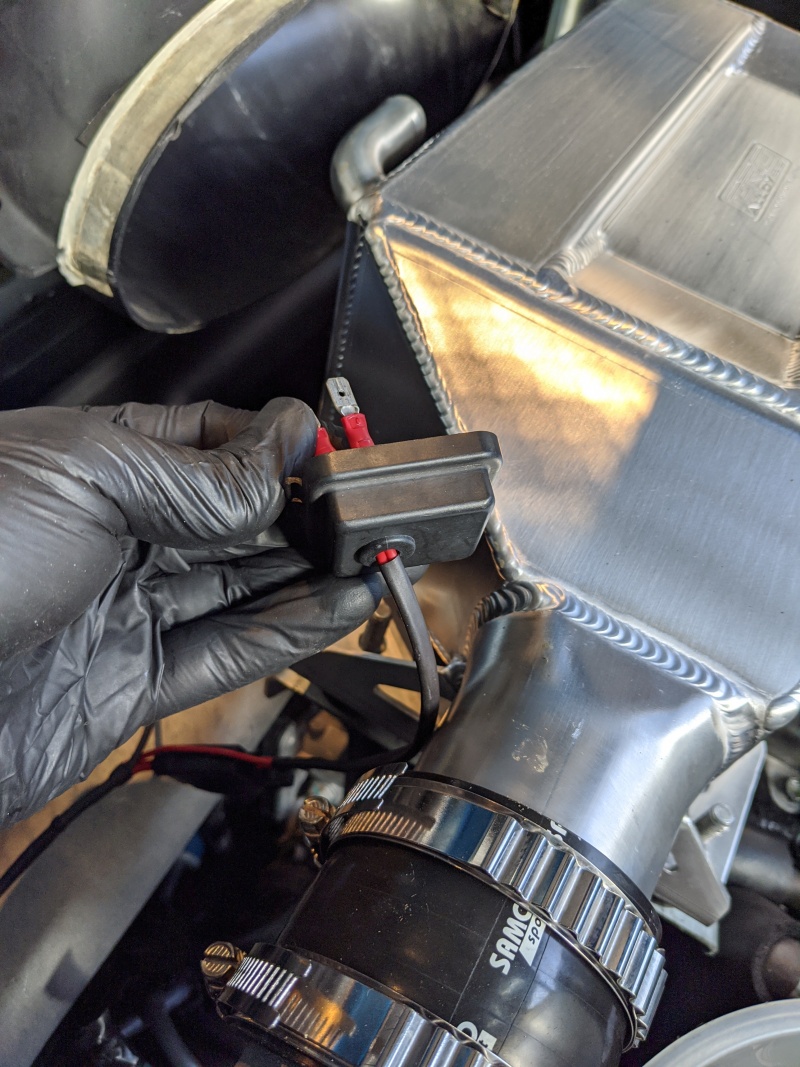
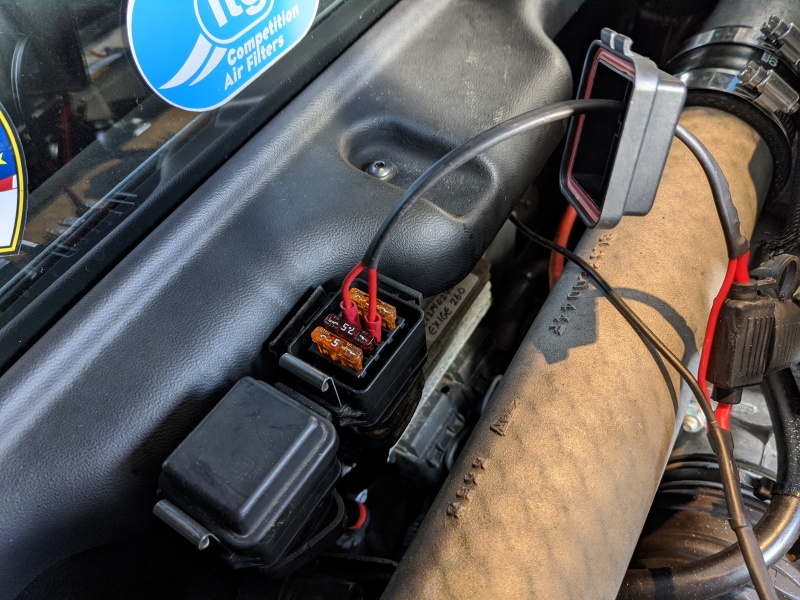
30. The pump comes with a wiring "piggyback" harness with a fuse holder. Simply fit the spade connectors into fuse R7 (10A-https://wiki.seloc.org/a/Fusebox). Do this by drilling a hole in the top of the cap (it's the inboard most fusebox in the engine bay), thread the two spades in with grommet and then seal the hole with sealant. The ring terminal needs fitting to an earth point, there's a few options for earthing as I believe the ECU mounting plate is earthed, but there's the main gearbox/chassis earth lead further down. Make sure a 10a fuse is fitted in the piggyback harness.
31. Fill the CC header tank with a coolant/water mix. I also added some water-wetter (snake oil?) for maximum gains with the IAT. Generally a weaker coolant/anti-freeze mix will be better at shedding heat from your IATs, so I went for the weakest mix I could whilst still getting a -7deg protection according to my anti-freeze checker. You won't get all 5 litres in right away, so just keep topping it up when you get to the burping/bleeding phase.
32. Top up the engine header tank with your desired coolant/water mix.
33. Follow the procedure to bleed the main radiator(https://wiki.seloc.org/a/Bleed_the_cooling_system), keep topping up the header tank as needed as the air is expelled. Keep doing this until the engine fans come on at least once to check your polarity/air flow direction. You may choose to do this with the CC pump disconnected just so you can concentrate on one job at once.
33b. Bleed the CC system by just running it for a bit (either with engine running or just on ACC if you trust your battery) and topping up as needed. The pump will not work if there's air in the system, which makes bleeding very difficult. I almost gave up and declared a dead pump a few times... What finally worked for me, was disconnecting the hose between the CC and the top of the header tank, and diverted that into a cup. I then applied air pressure to the header tank (by blowing into the top... Google the "inner tube method for coolant" for a more appropriate solution) and finally blew all of the air through the system and the pump kicked into life.
34. Refit front clam and refit interior panels. You should be able to shove the big chunk of NVH foam back in, but no drama if not.
35. Done
ADDITIONAL INFO
I weighed all of the kit added to the car, and all of the kit removed. Including coolant the chargecooler install added 13.45 KG.
Some people recommend adding a second pump to the circuit, one pushing and one pulling. Mainly for redundancy but may also increase flow. This is something I may consider after I can benchmark the performance of it.
Many older installs use a dedicated live from the battery to connect the pump, and simply take a relay feed from an ignition live rather than piggybacking the R7 fuse as-per this install. I may later revert to that original design as I'd consider it a bit more robust.
