Heater Actuator Replacement
Elise S2 to VIN ????? have manual temperature control.
MY?? onwards has electronic controlled temperature adjustment which is prone to failure.
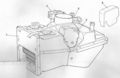
2=Actuator, 4=New rainwater guard
Exactly same actuator used on distribution unit


Part numbers:
- Actuator: A117M6052S (~£45 from Lotus dealer)
- Splash guard: ??
Procedure
1. Remove the front clam
2. Remove both rain water guards
The two curved plastic radiator shrouds. The left side one is shown in this photo.

3. Remove rain water guard over wiper motor

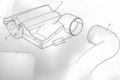
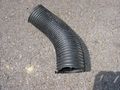
4. Remove large air pipe
The large diameter air pipe which goes from the heater unit to the distribution unit is not secured in place. It is a simple push fit.
The large diameter air pipe can be seen centre picture here


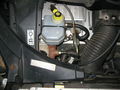
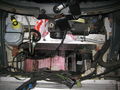
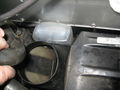
5. Move wiring out of way
Before the heater unit can be removed the wiring loom needs to be temporary relocated out the way. Snip the cable ties and drag towards the front of the car out the way. Also unplug the wire going into the actuator and blower fan and drag out the way.
6. Separate heater unit from blower fan
The heater unit is attached to the fan with two hand clasps. Undo these and forcibly seperate the heater unit from the fan. There is matted material on the front of the heater unit which over time bonds itself to the fan. Simply force these two units apart and take care not to damage the matted material too much!

7. Remove securing bar
Remove the securing bar across the top of the heater unit. Two 8mm bolts.
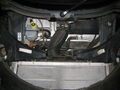
8. Remove coolant pipes from heater unit
Remove the two coolant pipes going into the heater unit. It's easier to remove these at the car rail pipe end and not on the unit itself. Also provides better access to remove the unit. A small amount of coolant will be lost and the car rail pipes can be blocked up with plastic shopping bags (or discarded rubber gloves make a better seal).
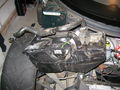
9. Remove the heater unit
Now the hard part! Shove the fan as far right as it will possibly go and then some more! Lift the front of the heater unit upwards and then diagonally towards the wiper motor. The heater unit will be exiting on the right side of the car.
Note the small amount of coolant fluid loss and plastic bags blocking the pipes!
Heater unit removed and turned through 180 degs to show actuator on reverse side.


10. Clean heater unit
There are actually two flaps within the heater unit with drive to the second unit via a small toothed belt.


11. Replace actuator
Make sure you fit the new (2006) splash guard over the actuator to avoid future breakages.
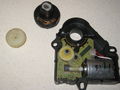
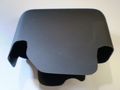
New plastic cover fits snugly over actuator
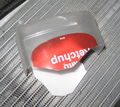
Or you could fashion something out of a used plastic tomato ketchup bottle!
Here you can see the cover fitted


